воскресенье, 18 марта 2018 г.

How To Build A Solid Root Cellar

We decided that our little farm needed a root cellar to store our produce in. For those unfamiliar with the term, a root cellar is an underground room that acts like a natural refrigerator, maintaining temperatures in the mid 30’s F in the winter and mid 50’s in the summer.

Step one: Dig a hole in the ground. We are fortunate to have a local gravedigger who is a real artist with a backhoe. He can carve a hole with straight sides almost within an inch of what you ask for.

Step two, pour a concrete footer. Then start laying blocks. About 320 went into this 8 x 8 foot cellar.

Almost finished here. Now, for the fun part, pouring a concrete roof. A simple flat slab wouldn’t do, for you want condensation to run off to the sides. So, I created a plywood from with an arched top. The arch would also create a stronger roof. It also created a very strong form.

The arches are 1/2 inch plywood pressed into dadoed grooves in the 2×4’s. This created an extremely strong structure.

A nice snug fit, supported by 3 vertical 2×4’s on each side. (Not shown in the picture are 8 pieces of 1/2″ plywood approximately 6″ x 23″. These were installed after the plywood sheets were added. They are used as extra reinforcing ribs by wedging them between the plywood sheets and the top of the 2×4’s.)

Next, the plywood, a sheet of plastic and lots of 1/2 rebar. Lots of rebar. Rebar is cheap, so why not? If this were a flat 4 inch slab, the calculated load rating is around 250 pounds/square foot. More then enough. But it is arched, and up to 5 inches thick. Also the rebar extends into the walls a foot, and are cemented in place. Not sure what the load rating is now, but it is certainly more than adequate.

Next, add a perimeter to the form and pour concrete. About 4,000 pounds worth. I expected at least a little deformation of my form, for all that weight was being borne by my 5 arches, but there was none! Impressive.

Not taking any chances, I did not enter the cellar until I was confident the concrete was fully cured. Removing the form from inside was not difficult, for it was designed for easy disassembly and re-use.

A view of the top before the entrance was completed and the cellar covered with 2 feet of earth. The wood at the rear is covering the ends of the rebar to prevent injury. They will be part of the reinforcement for the entrance-way.

I poured the roof in 3 sections, for that is the most concrete I can handle working alone. The seams are nearly invisible from below, and are waterproof. It was not difficult creating the arch in the top using standard concrete. The radius of the top arch is about 6 inches larger than below.

The arched ceiling is as glossy as a counter top, thanks to the plastic sheet I laid over the plywood. See light reflecting off ceiling in picture below…

Add stairs and doors at top and bottom, and you have a fine root cellar, ready for lots of fruits and vegetables. Currently we are storing apples, carrots and potatoes, and we are pleased with the results. One of the two 4 inch vents can be seen in the corner. The other is in the opposite corner.

To save labor and materials, I built the stairway with half of it on a foundation at the floor level, and the other half of the foundation just below the frost line. I felt that digging the entire stairwell to the floor level would have just created a large inaccessible space.

This project took a few months of evenings after work over the summer. It was cooler then, and the mortar did not dry too fast. All concrete and mortar, about 8,000 pounds in all, was either mixed with a small mixer, or by hand. Here is a drawing of the block layout…

In order to center my stairwell, I had to cut some blocks into two pieces, a 12 inch piece, and a 4 inch piece. That is because my interior width is 88 inches. If you make your width 96 inches, you will not have to do this. A wet tile saw cuts through concrete blocks with ease. I have used mine to cut many blocks, including the angled pieces that form the arched tops of the walls.

Since the saw can only cut about 1/2 inch deep, you make a cut on each side. The blocks will easily split then by driving a chisel into the cut. Make gentle taps, while moving the chisel along the cut and they will break cleanly. You can see how good the cuts are in the pictures of the walls before the roof was poured.

Here is a picture of a very similar cellar. He used a higher arch, which is something I would do if I had to do it all over again, for condensation does not readily run to the sides of my flatter arch. He was very conservative and used 28 vertical supports. I used only 6. His roof weighed 5,000 pounds wet vs. my 4,000 pounds, therefore his supports were holding only 250 pounds each, while mine were holding 670 pounds.

However, his ceiling was much higher than mine, and his 96 inch supports would be more prone to bending under the load than my 65 inch supports. His wood arches are on 16 inch centers, while mine are on 24 inch centers. However, I have a “backbone” made from a 2×4 running along the top, and 2 rows of plywood rectangles fitted in between my wood arches. He tarred his sides, I did not. To tar or not is determined by how wet your ground is.

This Company Just Struck the Mother Lode of American Oil

Original article and pictures take http://www.ecosnippets.com/diy/a-solid-root-cellar/ site
понедельник, 12 марта 2018 г.

How to Build a Humidor in 12 Easy Steps

This guest post was written by Reddit user doitdoitdoit, aka Michael Korostelev, a very talented woodworker and cigar aficionado! CheapHumidors.com would like to thank Michael for his contributions to our blog, and would encourage our readers to try their hand at building your own humidor using this step-by-step guide! Please feel free to leave any questions or comments in the comment section below!

After building a few shelves and coffee tables that didn’t fall apart, I realized I was actually having some fun and what I was doing was being called woodworking. I was also running out of room in my small house so if I wanted to continue making stuff, I would have to give it away. Luckily it is wedding season.

Over the past few years my buddies and I gradually got into smoking cigars and will always have a few every time we meet up. As one of them was getting married, I thought about building a humidor but was put off by the fact that this really was just a groom gift. After looking at the wedding registry and seeing stuff like candles, curtains and dish sets, maybe one humidor wont hurt.

I knew nothing about humidors before making this and after some initial research, it seemed pretty intimidating considering all the issues with wood movement and moisture on the humidor interior. It actually ended up not too bad and is definitely DIY-able, and of course you cant succeed if you don’t try so here are some build details:

Tools:

  • Table saw
  • Plunge router (could be optional)
  • Chisels
  • Sandpaper
  • Flush cut saw (or some fine tooth small saw)
  • Clamps

(there may be more I am forgetting, but as cigar smoking men, you or your buddies should have them laying around somewhere)

Materials Used:

  • ½ Inch Red Oak
  • ½ Inch Maple plywood
  • 1/8 Inch Spanish cedar
  • Redwood burl slab
  • Decorative inlay strips
  • 1/42 Walnut paperbacked veneer
  • Hygrometer and Humidifier

Total cost: approximately $70

The humidor is made out of Red Oak (home depot oak boards) for the sides, Maple plywood for top and bottom, walnut veneer, Redwood burl edge banding and some inlay strips I found on eBay. On the inside it is lined with Spanish Cedar. It is important to note that the top and bottom are plywood because of wood movement. Wood expands and contracts perpendicular to the grain as it absorbs and releases moisture. If the top and bottom were made from solid wood, the box would warp or split at the joints.

How to Build a Humidor in 12 Easy Steps:

1: These are most of the materials minus the Spanish Cedar and inlay strips.

How to Build a Humidor-Step 1

2: Using the table saw, I cut the Red Oak into the sides of the box. To glue on the veneer, I watered down the glue slightly so it can be brushed on. If I were to do this again, I would veneer first and cut the Oak board later.

How to Build a Humidor-Step 2

3: I used a router table to make rabbets on all the box sides. I used making tape to prevent tear-out. This can also be done on a table saw either with dado blade or multiple passes with a regular blade.

How to Build a Humidor-Step 3

4: After the sides were complete, I cut the tops from maple plywood to size, glued the whole thing together and put veneer on the top.

How to Build a Humidor-Step 4

5: Using the table saw, I cut small rabbets for the edge banding on all edges of the box. This step is easy and should be done without adjusting the fence.

How to Build a Humidor-Step 5

6: Cut small redwood strips from my big chunk. Used masking tape here so they don’t crack. This wood is pretty brittle.

How to Build a Humidor-Step 6

7: To make space for inlay, extend some shallow cuts on the table saw on the edges of the box. This step is similar to the edge banding cuts but much more shallow.

How to Build a Humidor-Step 7
How to Build a Humidor-Step 7A

8: Now I can glue in all the edge banding and inlay. After gluing, I sanded the whole thing with a random orbit sander. Be careful not to sand through the veneer here.

How to Build a Humidor-Step 8
How to Build a Humidor-Step 8A

9: This is a scary step. Cut the whole thing in half. This has to be done with multiple passes on all 4 sides, so it is important that each time the blade lines up.

How to Build a Humidor-Step 9

10: I cut the groves for the quadrant hinges using a plunge router. This can also be done with a drill with forstner bits and some chisels. Which I did use to clean up.

How to Build a Humidor-Step 10

11: Finally install glue the Spanish cedar. The edges have to be sanded just enough to let the box tightly close.

How to Build a Humidor-Step 11
How to Build a Humidor-Step 11A

12: For the finish, I sprayed the whole thing with lacquer. About 10 coats applied a few minutes apart. After the lacquer cures ( a few days ), I wet sanded with some fine grit sand paper (2000) and buffed it with polishing compound to get an even shine.

How to Build a Humidor-Step 12
http://www.finewoodworking.com/item/7670/free-plan-humidor

Some resources:

http://www.thewoodwhisperer.com/videos/rubbing-out-a-high-gloss-finish/

How to Build a Humidor in 12 Easy Steps by Guest Blogger

Original article and pictures take http://www.cheaphumidors.com/blog/how-to-2/how-to-build-a-humidor/?utm_source=CH&utm_medium=social&utm_campaign=xpost site

суббота, 3 марта 2018 г.

Our Work - Revel Custom Wine Cellars

With Owen, we used his dresser as his changing table. We’re using the same dresser/changing table set up in Emmett’s nursery (still under construction), but we added a changing table into the mix with baby #2.

In our old house, the living room, where we spent most of our time, was in the middle of our house with our master bedroom to the right and Owen’s nursery to the left. So when Owen was a newborn, we only had to walk all of 10-12 steps to his nursery to change his diaper 10+ times a day or change his spit-up-on clothes.

Now that we live in a two-story house, we wanted to set up a changing table on our main floor so we wouldn’t have to go up and down the stairs 10+ times a day while carrying a newborn (and this kid needs his diaper changed more like 14+ times a day). This was especially important for me in the weeks following giving birth when I was encouraged to take it easy.

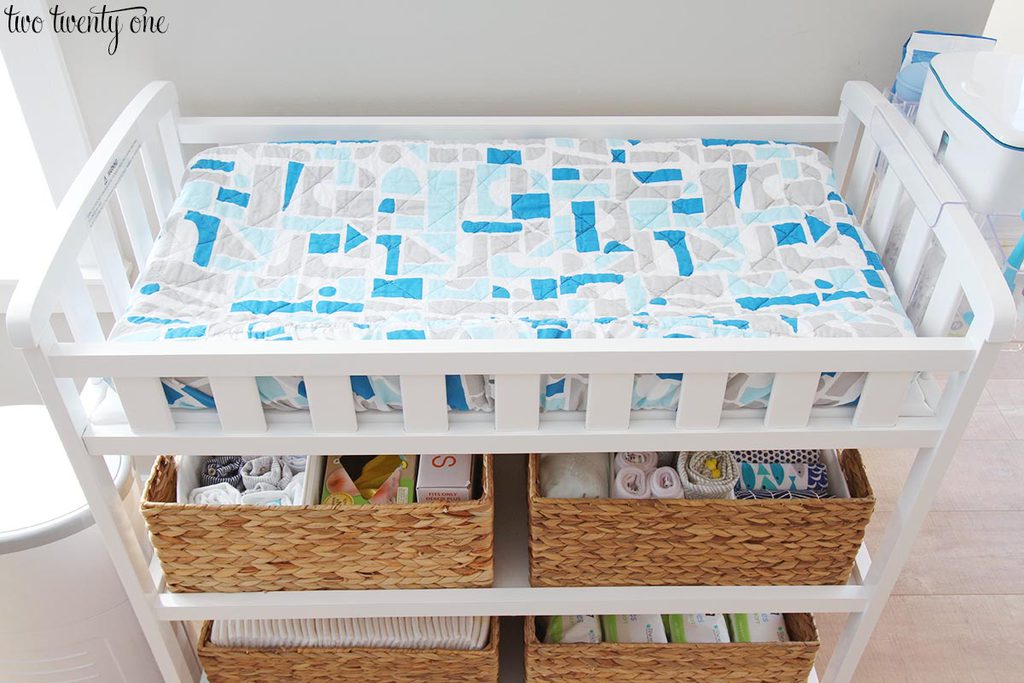
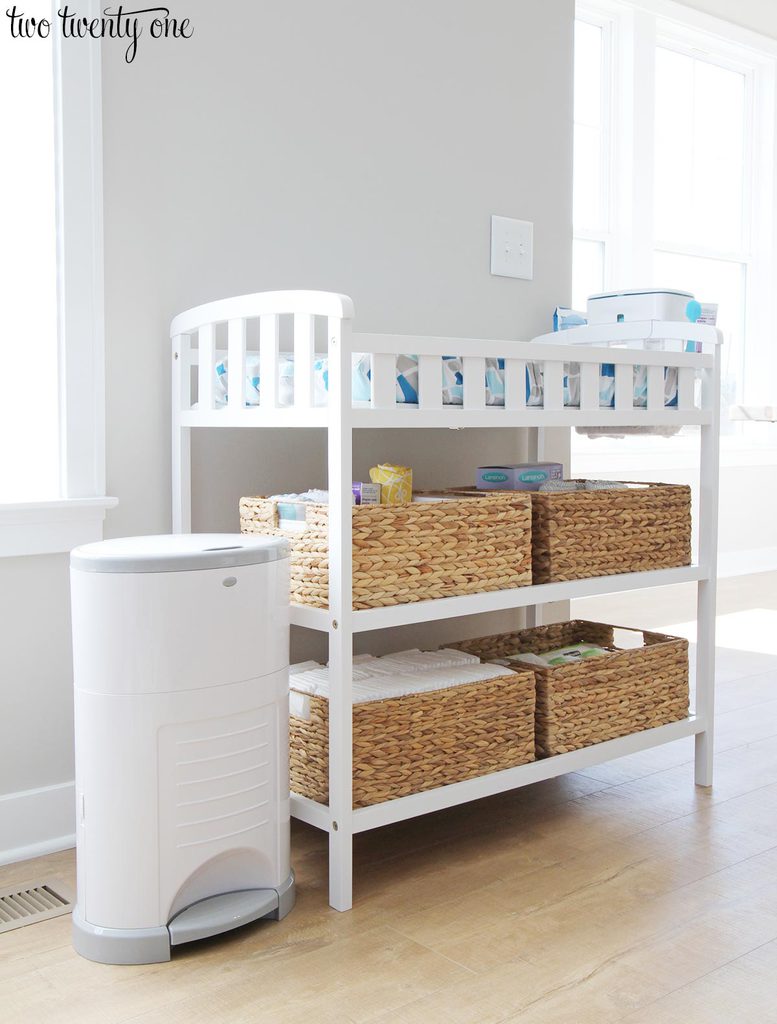
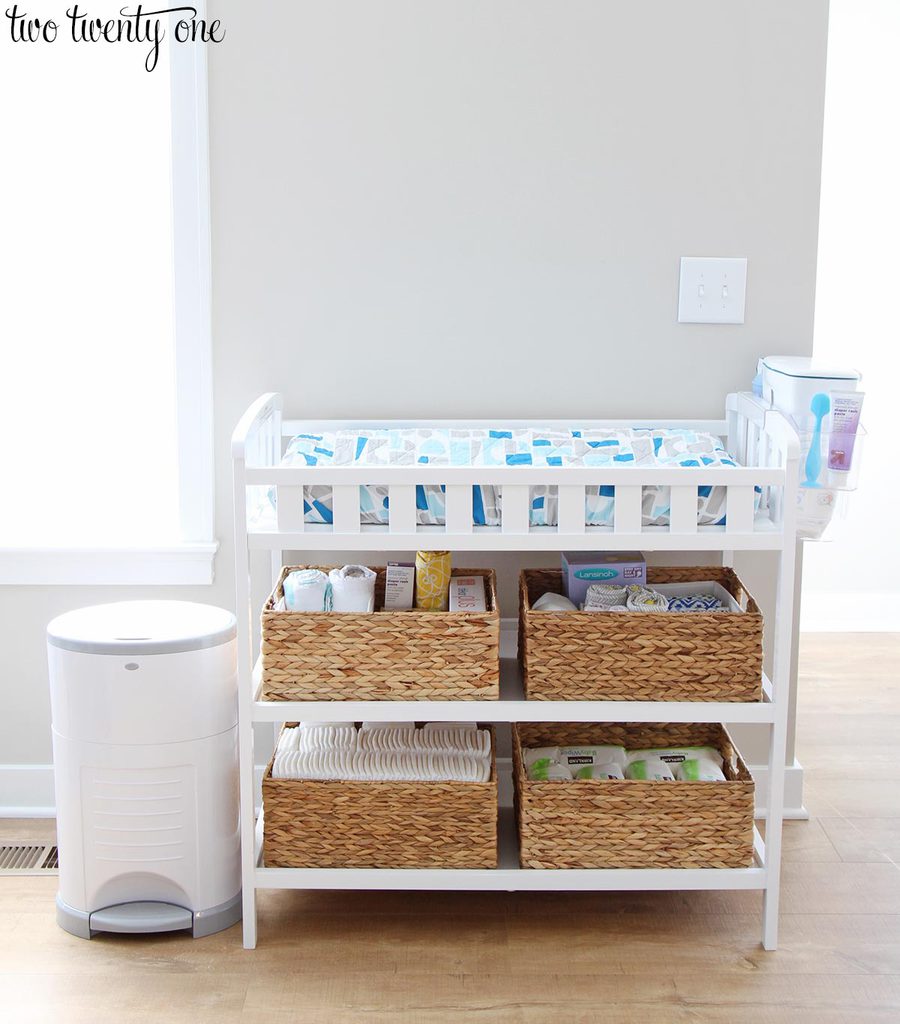
Since I didn’t want to drop a ton of money, I got this changing table for less than $60 and four baskets at Marshalls. I figured we can sell or donate the changing table once we’re done with it.

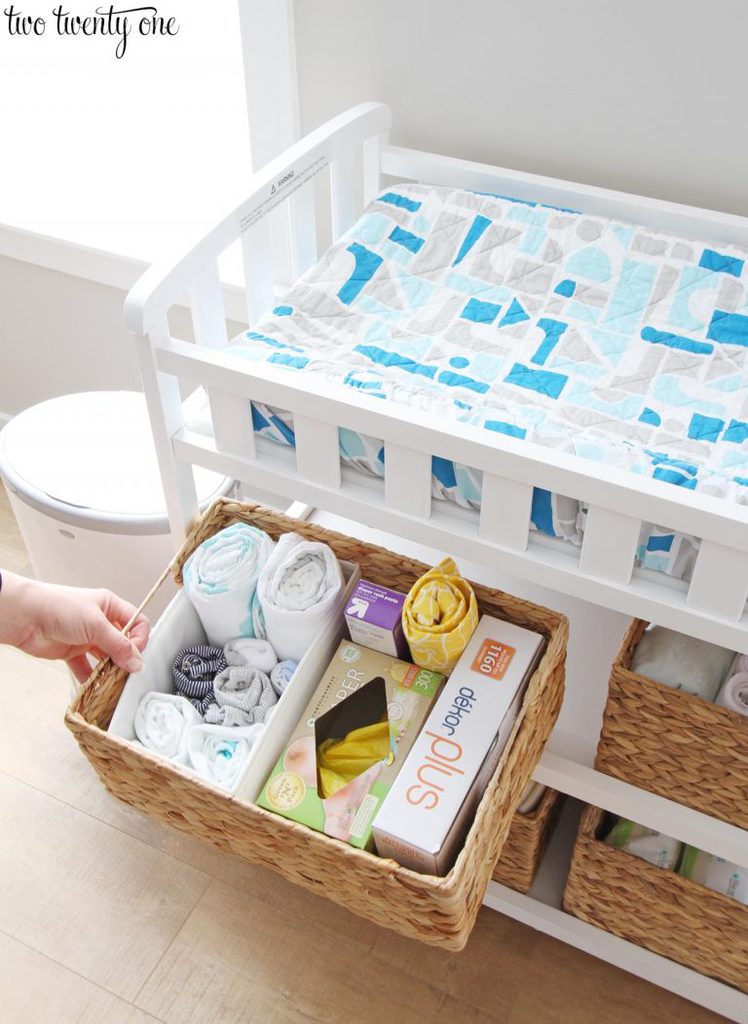
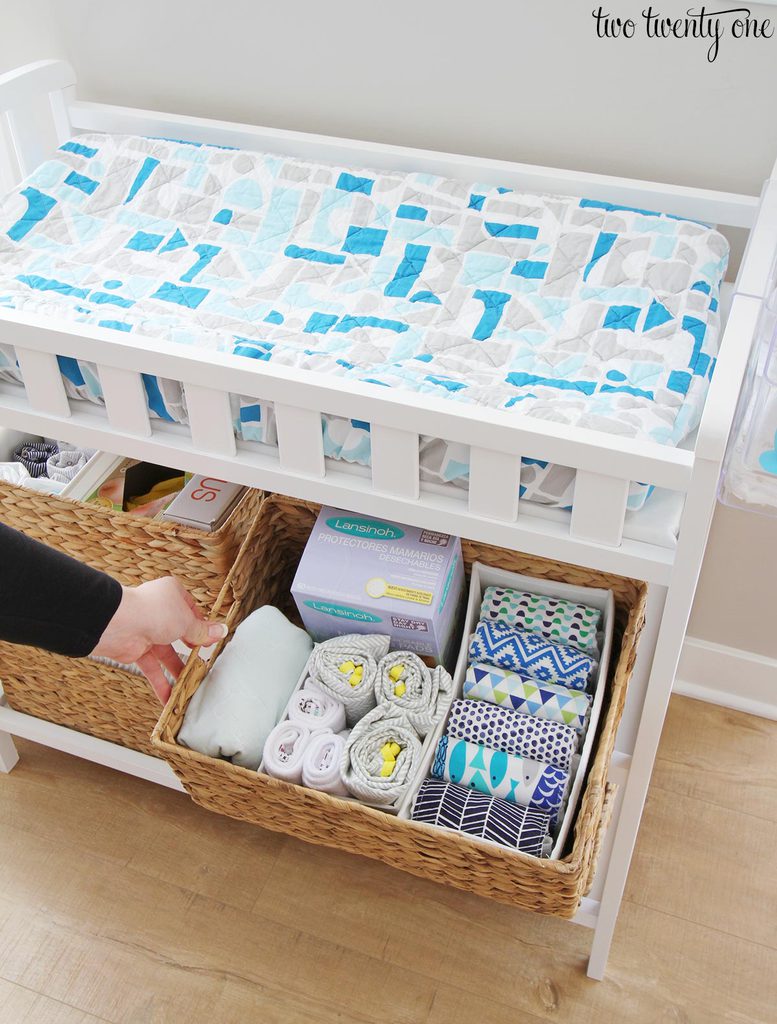
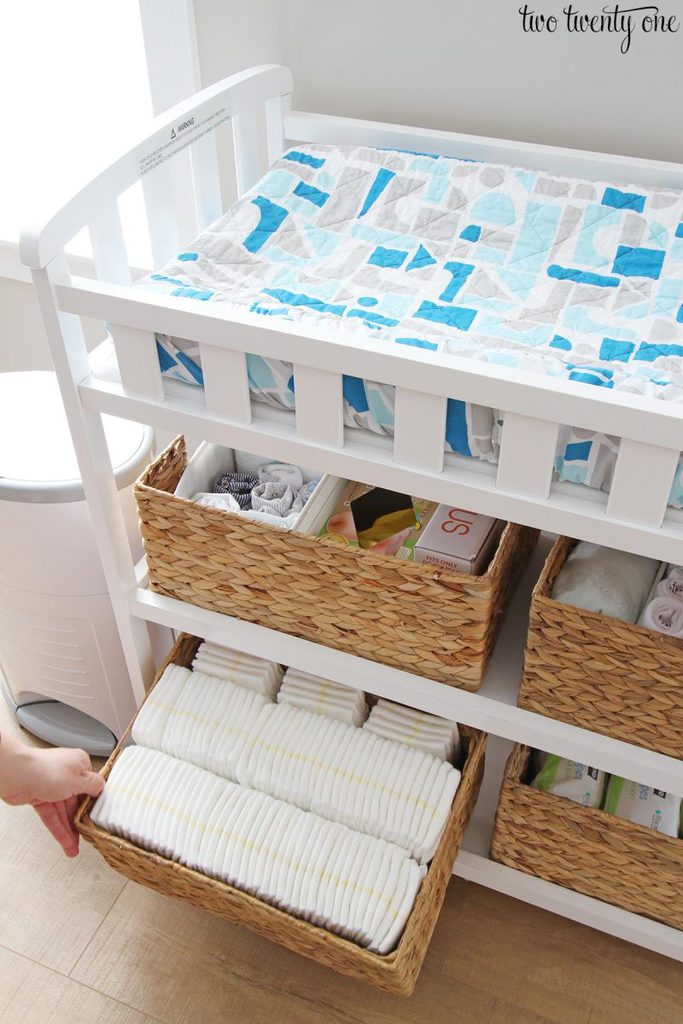
The top left basket holds a couple pairs of sleepers, onesies, socks, muslin blankets, diaper cream, nursing cover, diaper bags, and diaper pail refill bags.

I keep an extra nursing pillow cover, nursing pads, changing pad covers, changing pad liners, and DIY burp cloths in the upper right basket.

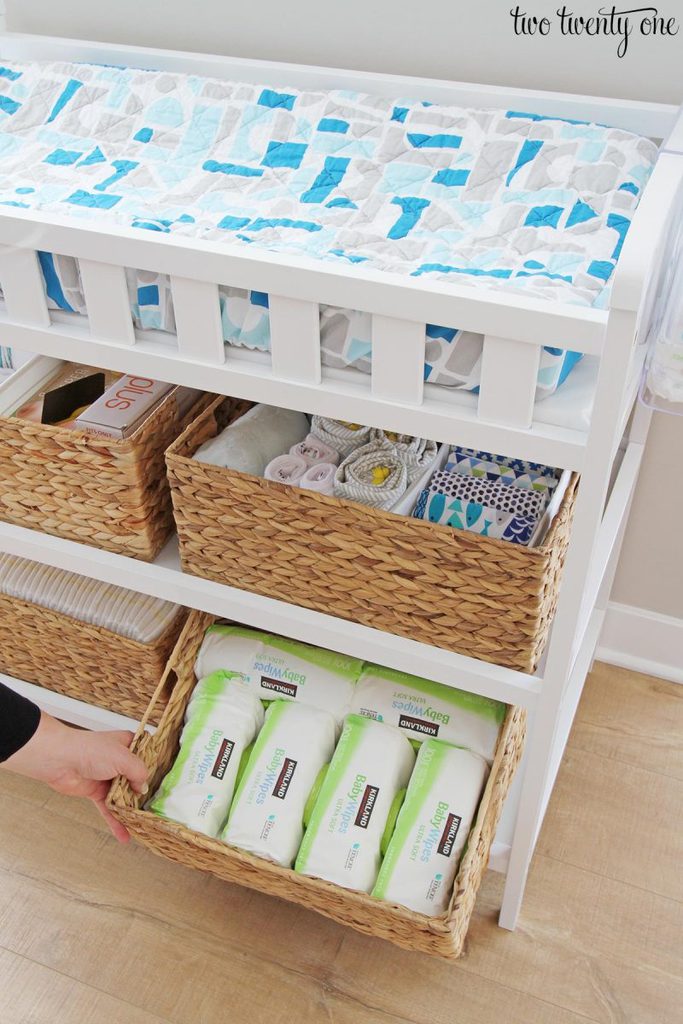
The bottom left basket is for extra diapers.

And the bottom right basket is for extra wipes.

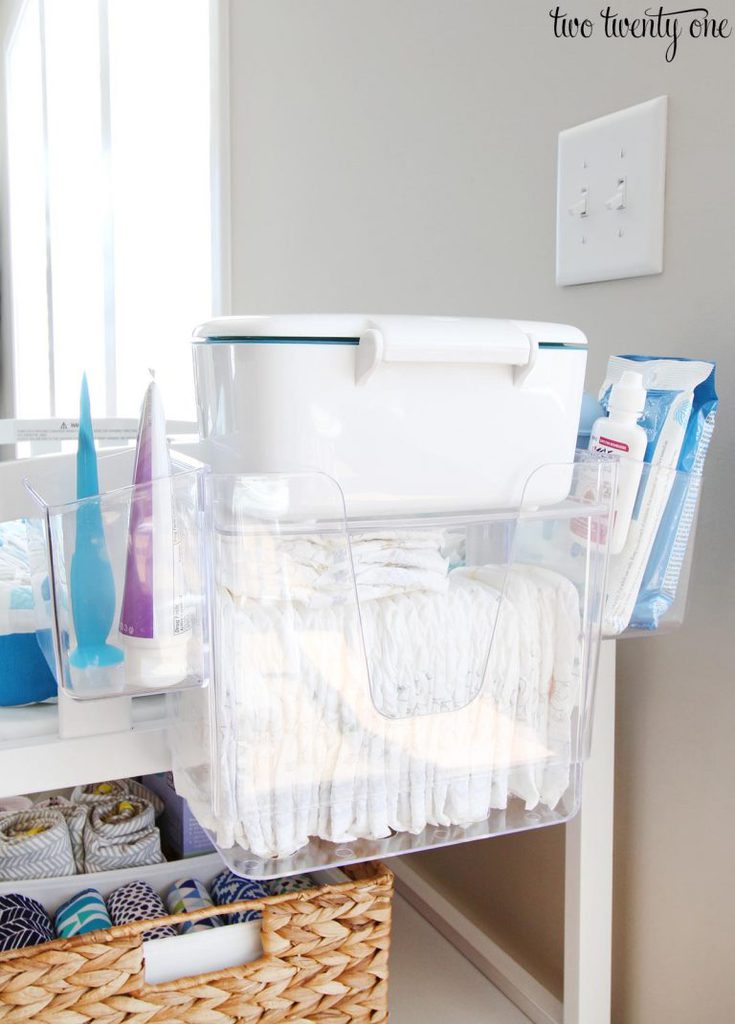
I love this diaper caddy. It holds a decent amount of diapers and the top spot perfectly holds our baby wipe dispenser. There’s also two smaller compartments for diaper cream, diaper cream applicator (love that thing), pacifier wipes, saline drops, and bulb syringe (we have a Nose Frida, but I prefer bulb syringes for newborns’ tiny nostrils).

The diaper caddy hooks onto the side of the changing table. It slides around a little bit, but it’s never fallen off.

The changing table comes with a pad, but I like how a contoured changing pad keeps babies more contained. And this one was only $14. I scored the changing pad cover from Land of Nod (now Crate & Kids) when it was on clearance for $6, so unfortunately, it’s no longer available.

My parents gifted us this diaper pail. We really like it so far. No smells can be smelled. But then again, newborn diapers don’t really smell anyway. Plus, when Emmett starts on solids we’ll do what we did with Owen’s #2 diapers– put them in a diaper bag and take it out to the big garbage can in the garage.

We love having this changing table on our main floor. I like how I can still keep an eye on Owen while he’s playing or eating breakfast or lunch if I need to change Emmett. And it’s been nice not having to go up and down the stairs numerous times a day.

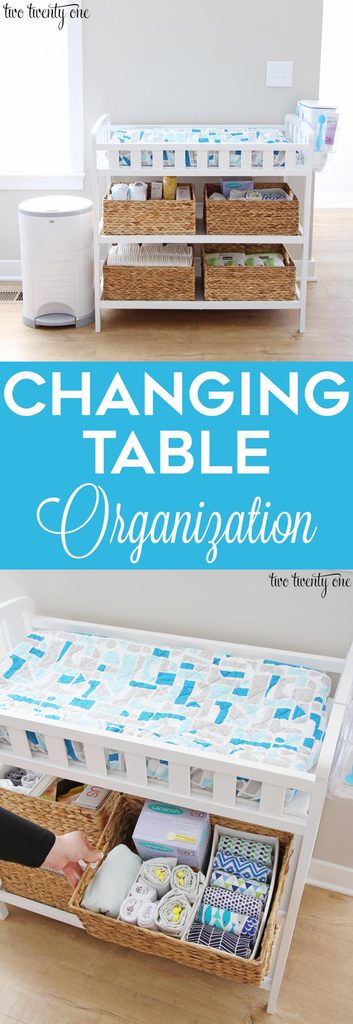
Changing table organization! Great tips and tricks!

Original article and pictures take https://www.twotwentyone.net/changing-table-organization/ site

понедельник, 19 февраля 2018 г.

3 in 1 Cot Bed | Changing Table | Chest Of Drawers

Buy Cot Bed Online
Buy Cot Bed Online
Cot Bed Dimensions
3 In 1 Cot Bed (Cot Bed / Changing Table/ Chest of Drawes) - MrHousey Exlusive

If you are looking for a cot bed that has it all then look no further, this handmade cot bed is not only a bed for your baby to sleep but also storage space for all the babies clothes and bed linen. This cot bed has besides its superb modern design a classic European make and shape to it. It uses clear-cut lines with soft corners and a baby safe white finish to bring a light and bright effect to the piece and in doing so adding warmth to the decor.

The cot bed has four small but spacious drawers which are tucked at the end of the cot bed and then under the cot bed the large drawer is nestled giving the effect of a length to the cot bed as pictured. The cot meets and exceeds all European and are own standards of safety so giving you a sound of mind as you put your baby into are modern functional hardwood cot bed. Having this cot bed in your baby’s nursery is a must have with its combinations of commode and cot bed will make the nursery not only more practical but give a modern fresh look.

Technical information:

  • Suitable from birth
  • Three mattress height function
  • Ability to remove the two side frames Two Detachable Slats, for easy child access
  • Material: Finest Quality Solid Wood, MDF / Plywood
  • Changing Top
  • Possibility to place drawers and cupboards on the left or right side of the crib
  • Dimensions of Cot Bed: width: 72cm/ Height: 100.5cm/ Length: 164cm
  • Dimensions for Mattress: width: 60cm/ length: 120cm (Available as an Option)
  • Assembly Required – Building the cot bed is not difficult. You should book approximately 30 minutes. We recommend two people to fix the Cot Bed. Full instructions will be provided to ensure the assembly process is straightforward
  • Quality is guaranteed by the EN 716-1, 2 & 3 European certificates.

This Cot is available in snow white

Baby Cot - White
Contemporary Cot Beds Online

If you Looking For Space Save Cots online which comes along with a chest of drawers and changing table then you should consider this Cot. It looks great but it is very practical. No need to spend extra pounds on Chest of drawers and changing tables. If you have any questions regarding this cot bed or any other nursery furniture please contact our sales team for support.

Original article and pictures take http://funique.co.uk/childrens-furniture/baby-cots/combo-cot-beds/funique-quality-3-in-1-cot-bed-changing-table-chest-of-drawers.html site

воскресенье, 18 февраля 2018 г.

To Best 4 Bunny

Welcome

Best4bunny has advice on rabbit care, health and well being. Our website is for everyone that has a pet rabbit, or is thinking about purchasing a rabbit, whether new to rabbits or experienced. Best4bunny is dedicated in helping to spread the word on what beautiful, intelligent and precious animals rabbits really are.

Original article and pictures take http://www.best4bunny.com/ site

понедельник, 5 февраля 2018 г.

Wine Racks, Wine Cabinets & Commercial Wine Storage Cabinets

Wine Racks Manufactured by A&W Moore in the UK since 1977

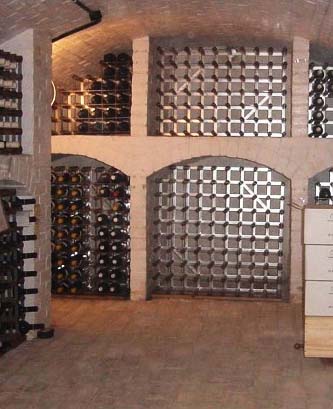
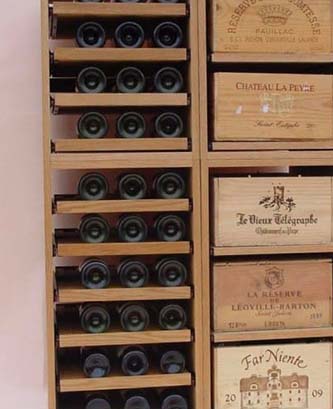
A & W Moore Wine Racks have been manufacturing wine racks in the UK since 1977. We are a family-run business, providing a comprehensive range of high quality wine racks and wine cabinet storage solutions. We have built our reputation on building bespoke wine racks using only the finest materials, to not only provide you with bespoke storage solutions that are tailor-made for your wine cellar, but also to ensure that no matter the wood or metal you choose, your wine storage solution will preserve your wine or champagne for generations.

Our reputation for quality products at affordable prices, combined with great personal service, means that we now have loyal clients from every corner of the globe, as well as across the United Kingdom. From luxurious hotels to countryside restaurants and private residences, choose from our large collection of oak wine racks or more contemporary wine cabinets to find your perfect fit.

Wine racks are an essential requirement for anyone who collects and enjoys fine wine. Apart from being functional in helping to store your bottles in the correct position, they have also become a central element to a modern or rustic decor. We specialise in the manufacture of elegant, sophisticated, made to measure wine racks and cabinets for home or commercial purposes, whether you are looking to create your wine cellar, organise a wine tasting, or would simply like to display your wine in your kitchen or shop.

For those who do not have a cellar, a decorative wine cabinet is an ideal alternative for storing wine and accessories. These handy storage units are not only an elegant way to store your bottles of wine and make sure they are preserved at their very best, but have also become an iconic piece of furniture.

With multiple designs to suit modern or traditional décors and commercial or residential budgets, you will certainly be able to find your ideal wine storage solution amongst our vast range, all sublimely marrying modern, traditional and good craftsmanship. We can also manufacture bespoke cabinets to suit the quantity of wine to be stored, which you can find out about using our wine rack dimensions calculator.

Original article and pictures take http://www.wineracks.co.uk/ site

суббота, 3 февраля 2018 г.

Root Cellar Project - Door finished and backfill complete

Root Cellar Project - Door finished and backfill complete | by Neuheimer

This was taken just after finishing the doors and the jambs with spar urethane. The natural color of the wood really came through just by applying the clear urethane. It's evident when you compare it to the previous photo in this set.

The backfilling is also complete and the cellar is ready for use. We had to add two retaining walls out front on either side in order to hold back the amount of backfill that was necessary. Fortunately, I had some small boulders in the woods nearby that we could use to build the walls. I'll touch up the backfill in spring after it settles and plant some groundcover to keep the erosion to a minimum.

This was a fun project, but I'm glad it's finally finished. Now I can start my woodshed.......

Original article and pictures take http://www.flickr.com/photos/stickley24/1450183824/ site